Preparing the exterior of your house for painting is a crucial step often overlooked by many homeowners. This process not only ensures that your new paint adheres properly but also extends its lifespan, saving you time and money in the long run. In this comprehensive guide, you will walk you through the essential steps of prepping your house’s exterior for a paint job. From assessing the condition of your walls to the necessary cleaning and repairs, each phase is vital for achieving a flawless finish. Let’s dive into the world of exterior painting preparation and set the stage for a stunning transformation.
Contents
The Importance of Preparation
Proper preparation is the cornerstone of any successful exterior painting project. Neglecting this step can lead to premature paint failure and additional expenses. A well-prepped surface ensures that the paint adheres correctly, providing a smooth, long-lasting finish. It’s not just about aesthetics; preparation is also about protecting your home from external elements like moisture and sun damage. By investing time in thorough preparation, you’re safeguarding your home against potential issues such as wood rot and mold growth.
Inadequate preparation can have serious repercussions. Paint applied on an improperly prepared surface is prone to peeling, blistering, and cracking. These issues are more than cosmetic; they expose your house to the elements, leading to more significant problems like structural damage. Skipping the prep work might seem like a time-saver initially, but it often results in higher costs over time due to frequent touch-ups and repairs. Therefore, understanding the necessity of meticulous preparation is the first step toward a durable and visually appealing paint job.
Assessing Your House’s Exterior
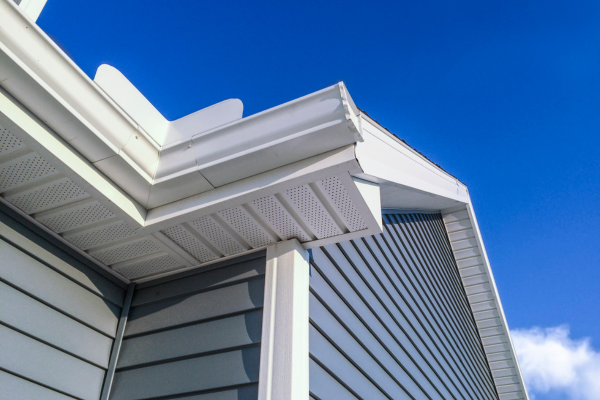
Before you even pick up a paintbrush, assessing the condition of your house’s exterior is critical. Start by conducting a thorough inspection, looking for any signs of damage such as cracks, peeling paint, or signs of mold and mildew. These issues need to be addressed before painting to ensure a smooth and successful application. It’s not just about fixing visible problems; this step is also about understanding the nature of your exterior walls, as different materials require different preparation techniques.
The type of surface you’re dealing with plays a significant role in your preparation strategy. Whether your house is clad in wood, brick, vinyl, or another material, each comes with its unique challenges and prep requirements. For instance, wooden surfaces might require more sanding and priming, while brick might need specialized cleaning to remove efflorescence. Tailoring your approach to the specific needs of your exterior improves paint adhesion and enhances the paint job’s overall durability. Taking the time to evaluate and understand your exterior sets the stage for a more efficient and effective preparation process.
Cleaning the Exterior Surfaces
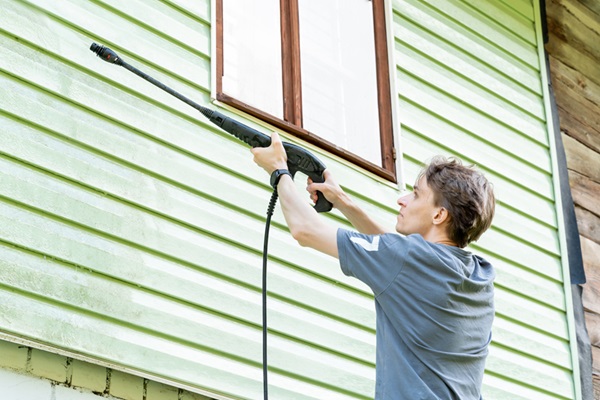
Cleaning the exterior of your house is a non-negotiable step in the preparation process. A clean surface is crucial for ensuring that the new paint adheres properly and looks its best. Over time, exteriors accumulate dirt, dust, and organic growth like algae and mildew, which can interfere with paint adhesion. The cleaning method you choose should effectively remove all these elements without damaging the underlying surface. For most homes, pressure washing is a popular choice, offering a quick and thorough clean. However, using the correct pressure settings is essential to avoid damaging softer materials like wood.
For those who prefer a gentler approach or have delicate surfaces, hand washing is a viable alternative. Using a soft-bristle brush and a mixture of mild detergent and water can be just as effective, though more time-consuming. The key is ensuring that every exterior inch is free from dirt and grime. Pay special attention to areas prone to accumulating dirt, such as under eaves and around windows. A clean surface not only ensures better paint adhesion but also reveals any underlying issues that might need addressing before moving on to the next stage of preparation.
Making Necessary Repairs
After cleaning, the next critical step is making any necessary repairs to the exterior of your house. This phase is about addressing any damage that could undermine the quality of your paint job. Start by filling in cracks and holes, and if you find any rotted wood, it should be replaced promptly. Not only do these repairs create a smooth surface for painting, but they also prevent future issues like water infiltration, which can cause more extensive damage over time.
The materials you choose for repairs are just as important as the repairs themselves. It’s essential to use products that are compatible with your exterior surface and the type of paint you plan to use. For example, using a flexible filler for wood surfaces allows for natural expansion and contraction, reducing the likelihood of future cracking. Similarly, for masonry surfaces, it’s crucial to use a filler that matches the texture and color of the existing material. Properly executed repairs not only enhance the appearance of the final paint job but also contribute to the overall structural integrity and longevity of your home’s exterior.
Sanding and Scraping

Sanding and scraping are integral parts of the preparation process, essential for achieving a smooth surface for painting. Sanding helps in smoothing out rough areas and removing any residual old paint, providing a better base for the new coat. This step is particularly crucial for wooden surfaces, where uneven textures can lead to an unsatisfactory finish. Scraping, on the other hand, is effective in removing loose or peeling paint, ensuring that the new paint adheres well to the surface. It’s essential to sand and scrape thoroughly but gently, to avoid damaging the material underneath.
When undertaking sanding and scraping, personal safety should be a priority. Always wear protective gear like gloves, goggles, and a mask to avoid inhaling dust and debris. Utilize the appropriate tools for each task: sanders for smoothing surfaces and scrapers for removing old paint. It’s also vital to clean up all dust and debris after sanding before moving on to the next step. A clean, smooth surface enhances the paint’s adherence and contributes to the overall aesthetics of the finished job, ensuring a professional and lasting result.
Priming the Surface

Priming is a step that should not be overlooked in the preparation process. A primer serves as an intermediary layer between the raw surface and the paint, improving the paint’s adhesion and ensuring a uniform appearance. It is particularly crucial for surfaces that have been repaired or have exposed raw material, as these areas can absorb paint unevenly. Choosing the right primer is dependent on the type of surface you are working with – for example, wood and masonry require different kinds of primers. A good primer not only improves adhesion but also increases the durability of the paint job.
The application of primer should be done carefully and thoroughly. Use a brush or roller suitable for the texture of your exterior surface, and apply the primer evenly across all areas. It’s important to allow adequate drying time, as recommended by the manufacturer, before proceeding to painting. This step not only ensures a better bond between the paint and the surface but also helps in achieving a more vibrant and consistent color. Skipping priming may save time initially, but it can compromise the quality and longevity of your paint job in the long run.
Masking and Covering Areas

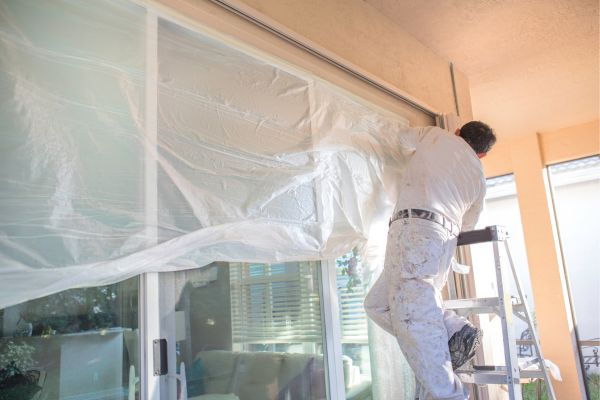
Proper masking and covering of areas that are not to be painted is a crucial step in the preparation process. This includes windows, doors, trim, and landscaping. Effective masking ensures that these areas are protected from paint splatters and overspray, which can be difficult to remove and can mar the overall appearance of the job. Using high-quality painter’s tape is essential for creating sharp lines and preventing paint from bleeding through. It’s important to apply the tape carefully, ensuring it adheres well to the surface without leaving gaps.
The choice of covering materials is also important. Drop cloths made of canvas or plastic are ideal for covering large areas such as decks, walkways, and plants. For smaller or more delicate areas, plastic sheeting or newspaper can be used. It’s important to secure these coverings properly to prevent them from being dislodged by wind or movement during the painting process. Remember, the time and effort spent in masking and covering are investments in achieving a clean, professional-looking finish. Careful preparation in this step can save significant time in cleanup and repairs post-painting.
You’re Ready To Begin Your Painting Journey
Preparing the exterior of your house for painting is a detailed but rewarding process. Each step, from cleaning and repairs to priming and safety considerations, plays a vital role in achieving a professional and lasting finish. Remember, the effort you put into preparation directly impacts the quality of your paint job. So, roll up your sleeves, follow these guidelines, and transform your home’s exterior into a stunning masterpiece. Your house deserves the best; give it the attention it needs to shine.